
SEO Migration Checklist: Every Step to Protect Your Rankings

A site migration is one of the few times in SEO where you can lose years of ranking progress in a single afternoon — not because Google is punishing you, but because a redirect got missed, a noindex tag shipped to production by accident, or nobody thought to check whether the staging site’s robots.txt made it into the launch.
None of that is unusual. It happens on migrations run by experienced teams. The fix isn’t luck, it’s a checklist you actually follow in order, broken into the three phases where things go wrong: before launch, at launch, and in the weeks after.
What counts as a migration
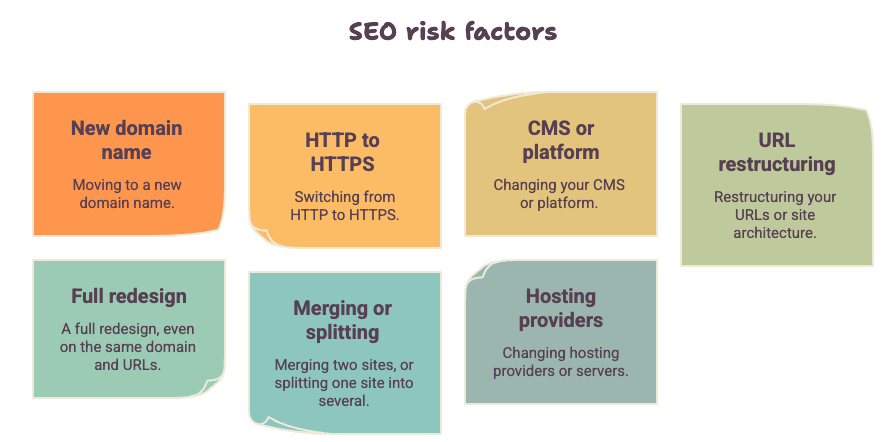
Any of these count, and each one carries its own SEO risk:
- Moving to a new domain name
- Switching from HTTP to HTTPS
- Changing your CMS or platform
- Restructuring your URLs or site architecture
- A full redesign, even on the same domain and URLs
- Merging two sites, or splitting one site into several
- Changing hosting providers or servers
If more than one of these is happening at once (a redesign plus a CMS switch, say), treat it as a higher-risk migration and add extra time for testing before launch.
Planning a website migration? Let our SEO experts handle the entire migration process with zero ranking loss.
Phase 1: Before you touch anything
This is the phase most teams rush, and it’s the one that determines whether the rest of the process goes smoothly.
Set a baseline
You can’t tell if the migration worked unless you know exactly where you stood beforehand.
- Export a full list of every indexed URL on the current site (Search Console, an XML sitemap, and a crawl from a tool like Screaming Frog — use all three, since none of them alone is complete).
- Record current rankings for your priority keywords.
- Pull organic traffic and conversion numbers for at least the last three months, ideally the last twelve, so you can account for seasonality later.
- Save a full backlink export — you’ll need this to check that your most valuable inbound links still point somewhere useful after launch.
- Screenshot or archive key pages, including titles, meta descriptions, headers, and schema markup.
1. Crawl the current site
- Run a full crawl and list every live URL, along with its status code, title, and canonical tag.
- Note which pages currently rank and drive traffic — these are the ones that need the most careful handling, not necessarily the ones with the most pages behind them.
2. Build the URL redirect map
This is the single most important document in the entire migration.
- Map every old URL to its new equivalent, one row at a time. Don’t rely on pattern-based redirects alone for high-value pages; map them individually.
- Use 301 redirects for permanent moves. Avoid redirect chains (A to B to C) — point every old URL straight to its final destination.
- Where an old page has no true equivalent on the new site, redirect it to the closest relevant page, not the homepage by default. A relevant category or parent page passes far more value than a blanket homepage redirect.
- Double-check parameters, trailing slashes, and case sensitivity — these small details cause a surprising share of post-launch 404s.
3. Brief the whole team
- Share the redirect map and technical requirements with developers before build begins, not after.
- Flag any CMS limitations early — some platforms don’t let you fully control canonical tags or URL structure without custom work.
- Agree on a launch date and a rollback plan in case something goes seriously wrong.
Phase 2: Staging and pre-launch testing
- Block the staging environment from search engines with a password or IP restriction — never rely on a noindex tag alone, since it’s easy to forget to remove.
- Confirm every page on staging has the correct title, meta description, header structure, and internal links carried over from the audit.
- Test the redirect map on staging before it goes live. Spot-check a sample of high-traffic URLs manually, don’t just trust the spreadsheet.
- Check that canonical tags on the new site point to themselves (or the correct canonical version), not to old URLs or staging URLs.
- Verify structured data (schema) is present and validates correctly on the new templates.
- Confirm the new XML sitemap includes only live, indexable URLs — no redirects, no 404s, no noindexed pages sitting in it.
- Check that robots.txt on staging is blocking crawlers, and prepare the production robots.txt separately so it doesn’t accidentally carry the staging block through to launch.
- Test page speed and Core Web Vitals on a few key templates before launch, not after.
Phase 3: Launch day
- Push the redirect map live at the same time the new site goes live — not before, not hours later.
- Immediately confirm robots.txt on the live production site is NOT blocking search engines (this is the single most common launch-day mistake, and it’s caused by exactly the staging-block step above not getting reversed).
- Submit the new XML sitemap in Google Search Console.
- Use the URL Inspection tool to request indexing on your highest-priority pages.
- Spot-check a sample of old URLs to confirm they 301 to the correct new page and return a 200 status, not a soft 404 or a redirect loop.
- Update internal links across the site to point directly to new URLs rather than relying on redirects to catch them — redirects should be a safety net, not the primary path.
- Update your XML sitemap references in Search Console, and remove or update any old sitemap submissions pointing to the previous URL structure.
- If you changed domains, set up a change of address in Search Console (found under Settings) so Google can transfer signals faster.
- Notify your most important external link sources (partners, directories, press mentions) so they can update to the new URL directly instead of relying on the redirect.
Phase 4: The weeks after launch
This is where most teams stop paying attention, and it’s exactly when problems tend to surface.
- Monitor Search Console daily for the first week, then a few times a week after that. Watch the Coverage report for a spike in errors or excluded pages.
- Compare crawl stats before and after migration — a sudden drop in pages crawled per day can signal a technical block.
- Track rankings for your priority keyword list against the baseline you recorded in Phase 1.
- Watch organic traffic day over day, but give it time — a short dip in the first one to two weeks is common even on a well-executed migration, since Google needs time to recrawl and re-evaluate the site.
- Re-crawl the live site and check for any redirect chains, unexpected 404s, or pages that reverted to old titles or metadata during deployment.
- Confirm analytics tracking is firing correctly on the new site — a broken tracking tag can look exactly like a traffic drop when it’s actually a measurement problem.
- Check that backlinks pointing to old URLs are landing correctly through the redirect, especially your highest-authority links.
- If anything drops sharply and doesn’t recover within a few weeks, go back through the redirect map and robots.txt first — that’s where the majority of post-migration ranking losses trace back to.
The mistakes that cause the most damage
A few issues show up again and again across migrations, and they’re almost always avoidable:
- Missed redirects. Even one unredirected high-traffic page can cost real visibility, and a bulk pattern-based redirect can quietly miss edge cases.
- Robots.txt left blocking the live site. The exact file used to keep staging private accidentally ships to production.
- Redirect chains. Each extra hop adds delay and can dilute the signal passed through; keep every redirect a single step.
- Homepage redirects used as a catch-all. Sending every unmapped old URL to the homepage tells Google the two pages aren’t really related, and you lose most of the ranking value that page had built up.
- Internal links not updated. Leaving old links throughout the site relying on redirects to compensate. It works, but weakly, compared to direct links.
- No rollback plan. If launch goes wrong, having no clear way to revert quickly turns a fixable problem into a prolonged one.
FAQs
How long does it take for rankings to recover after an SEO migration?
Most well-executed migrations see rankings stabilize within two to eight weeks, depending on site size and how quickly Google recrawls the new URLs. Larger sites, or migrations involving a domain change, tend to take longer to fully settle.
Do I need to redirect every single old URL?
Yes, ideally. Even low-traffic pages can carry backlinks or long-tail ranking value you’re not aware of until it’s gone. Where a true one-to-one match doesn’t exist, redirect to the closest relevant page rather than skipping the redirect entirely.
Is some traffic drop after a migration normal?
A short, temporary dip in the first one to two weeks is common, since Google needs time to recrawl and reprocess the new URLs. A drop that continues past four to six weeks, or one that’s severe, usually points to a specific technical issue such as a blocked robots.txt, missing redirects, or noindex tags that shipped by mistake.
What’s the most important document in an SEO migration?
The URL redirect map. It’s the single piece of work that determines whether link equity, rankings, and user bookmarks carry over correctly. Everything else in the checklist supports or verifies this one document.
Should I use 301 or 302 redirects for a migration?
Use 301 redirects for any permanent move, which is what a migration almost always is. A 302 signals a temporary change, and Google may be slower to pass ranking signals through a redirect it doesn’t treat as final.
Can I skip staging and test directly on the live domain?
It’s not recommended. Testing on a blocked staging environment first catches broken redirects, missing metadata, and template errors before they’re visible to users or search engines, which is far cheaper to fix than repairing a live site after launch.
